Tuesday, May 31, 2011

Month of Creativity

Ok, here goes.

I'm going to try...


TRY...


TRRRY...


to be creative 
EVERY DAY
for the month of June.

This will be tricky.
My husband works in June from 7am to 9pm.

I'm with the boys.


I still have work to round up from the school year.
I have a lot of work to do for next year's homeschool high school program I'm creating.
I may be moving to a new house (oh please, oh please, oh please)

My mom and her fiance are coming to visit.


My in-laws are coming to visit.


So, I may drop the ball here and there.
But I'm seriously going to do my best.

Thanks for your hope and intentions and "Atta-girls"!

Monday, May 30, 2011

Puddle Days

It has been raining for days.
A constant cloud has been hanging over our normally sunny sky for so long.
Each day is a puddle day.
Since we're spending all our time in puddles, or inside, the rain has been finding its way into my art.

Oliver in the puddles:


Solomon in the puddles:

The beginning of a lino print of Solomon's rain boots in a puddle.

I haven't started printing yet, so I'm expecting some reworking will be necessary.  We'll see.  

Rain, we love you in your cozy, blustery wetness.
Sun, we miss your warmth.  You may come kiss our faces any day.
We're ready.

Friday, May 13, 2011

Collaborative pastel drawing


Waldorf Alumni Night 2011

25 high school students.
Me.
18 packages of pastels.
One Van Gogh painting cut into 99 two-inch squares.
A glue stick.


The original masterpiece.


Printed and cut into 99 2" x 2" squares.


Twenty-five high school students who used to go to our school gathered for 45 minutes.
They were each given 4 little squares of the painting and 4 blank squares to create their own versions.


Using pastels and fingers, they recreated their squares on their own paper and assembled them together on a numbered grid.


Our final collaborative creation.

So much fun in 45 minutes!  I love collaborative art!


Tuesday, May 10, 2011

Ten on Ten May


Ten on Ten
May 2011

take one photo an hour for ten hours - capture a snapshot of the ordinary beauty of a simple day in your life!

Ok, I was teaching today and chose not to interrupt my teaching with photographs.   So, these ten photos are not spaced evenly throughout my day.  Fifth, sixth, seventh, and eighth graders saw me with my camera and posed for me.  Consecutive grades, not hours.  

Today's photographs made me realize that Spring is balancing on the precipice of Summer.  The sky is blue, the children are giddy, the dandelions are blooming and all the colors are bright.  
Hooray!


Happy May Tenth!
Cheers to you all!

Monday, May 9, 2011

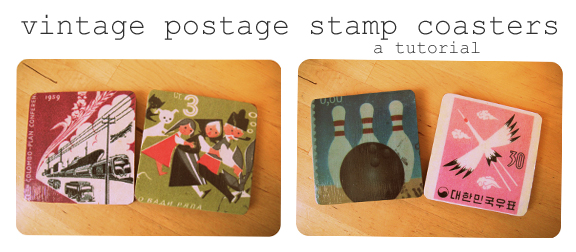
Coaster Tutorial with Vintage Postage Stamps

Make your own colorful coasters from images of vintage postage stamps. 


Supplies:
Wooden or bamboo coasters (I got mine at Target for $4)
Four images printed in high quality to fit the coasters
Large paintbrush (bigger than in the picture)
Mod Podge, matte or glossy
Acrylic sealer, matte or glossy (not in the picture)
Paper cutter or scissors

1. Print your images.  These four vintage stamp images plus a couple more are available to download and print at the bottom of this page.  They will print 4" x 4", since that seems to be the typical coaster size.  


2. Cut your images to size.  Mine were 4" x 4".  I rounded the corners slightly to match the bamboo coasters I bought.


3. Using a large paintbrush, spread your coasters with a thin, even layer of Mod Podge.


4. Lay your image on top of the Mod Podge and gently press down, starting in the center and working out. Make sure the edges are lined up well.  Then, wipe away any Mod Podge that leaked out.


5.  Let your image dry for 20-30 minutes.


6. Spread a thin, even layer of Mod Podge over your images.


7.  Let it dry 20-30 minutes until it is dry and clear.  
8.  Add a two more coats, allowing them to dry in between applications.


9. Take your coasters outside where you have good ventilation.  Spray them with your acrylic sealer according to the bottle's directions.  I sprayed two coats of glossy.
(If you're outside, pay attention to the wind; you don't want this toxic stuff to spray all over you accidentally.  Also, make sure you're not somewhere with lots of dirt or dust that may blow onto your coasters while the sealer is drying.)


10. Let your coasters dry and then bring them inside.
Pour yourself a drink.

Printable vintage stamp images:
You may need to resize these, depending on your coaster size.


Related Posts Plugin for WordPress, Blogger...